This post may contain affiliate links and we may earn compensation when you click on the links at no additional cost to you.
I love to use maps to help with my travel planning. One of my favorite maps for travel planning is Google My Maps. While it is similar to Google’s better known Maps, the My Maps feature allows you to add layers of directions and plot points along the way for an easy travel planning experience.
Setting up your Google My Map
To start with Google My Maps, go to mymaps.google.com. If you don’t already have a Google account, you will need to set one up to get started using the My Map feature.
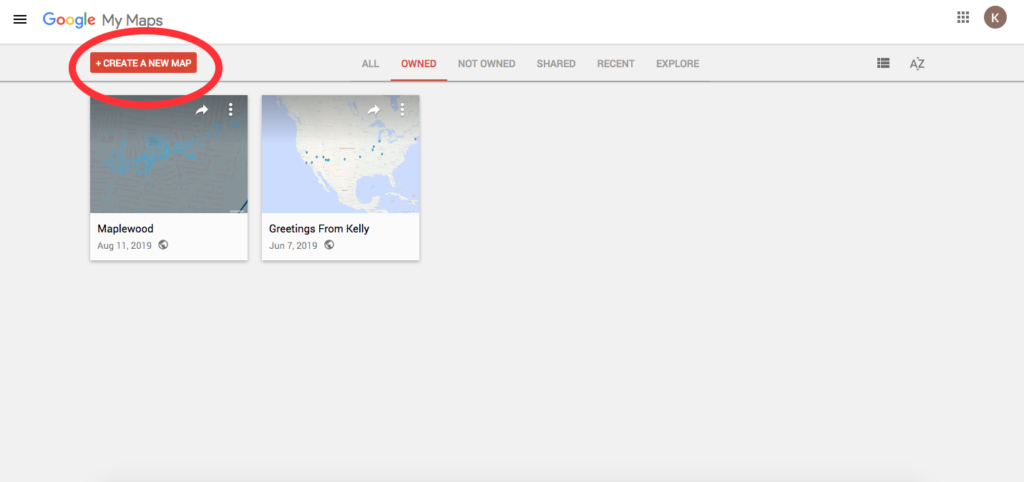
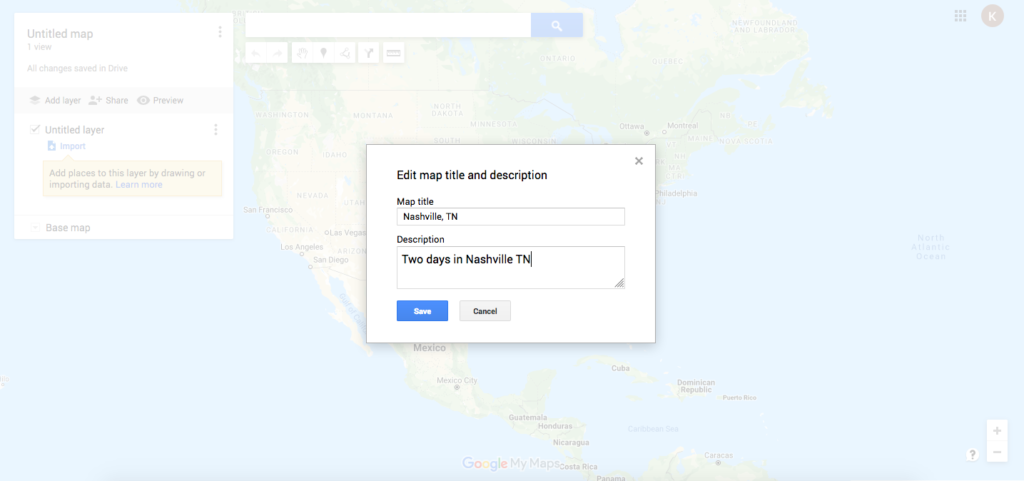
Once you’re here, click the “Create a New Map” button in the top left corner. Your new map is now created. To name your map, click on where it says “Untitled Map” to rename it. I like to name my maps after where we are traveling to. I’ll also include other information such as how long we’ll be staying, who we are with, and the dates of our trip.

Plotting Points on Google My Map
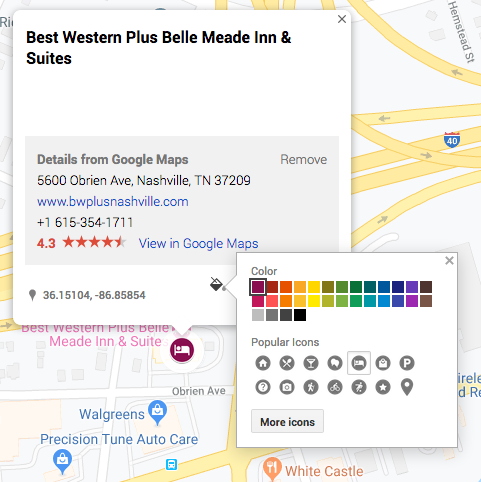
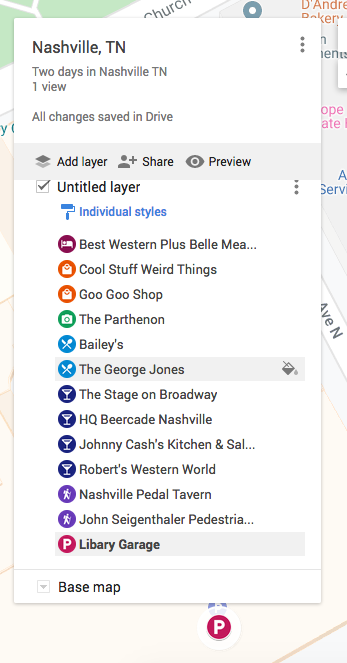
The first and easiest point to plot on your map is the place you’re staying. You can plot this point either by finding it on the map and clicking on it, or by searching for it in the search bar on the top. We stayed just outside of downtown Nashville for our trip. Click on “add point to map” to save the point to your map.
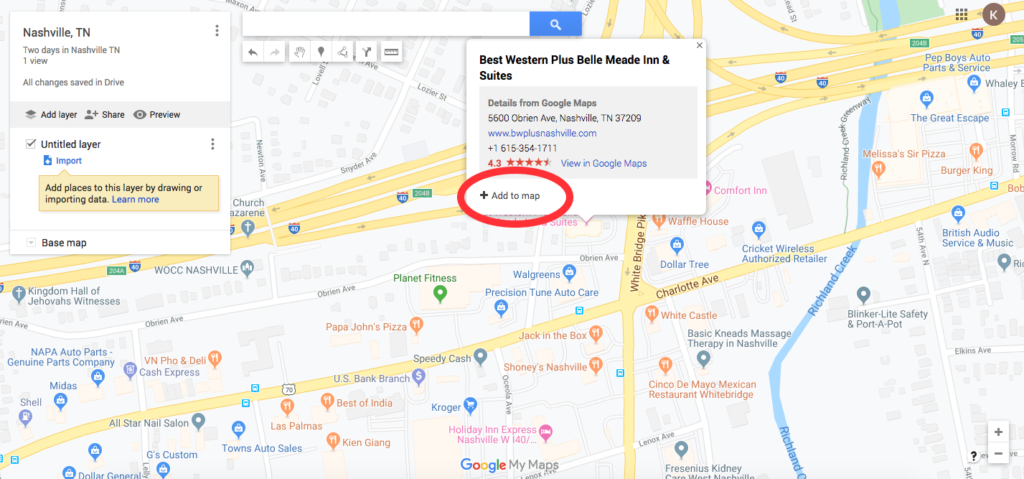
For quick and easy identification of the points you’re plotting, you should change the color and icon of the place you’re staying to make it stand out. The ability to color code destinations is one of the biggest benefits to using digital maps for travel planning.
Add your second point by searching for your next destination in the search bar. If you need ideas for how to find points to add to your map, check out my post Five Ways to use Social Media to Plan your Next Vacation.
Organizing your Map
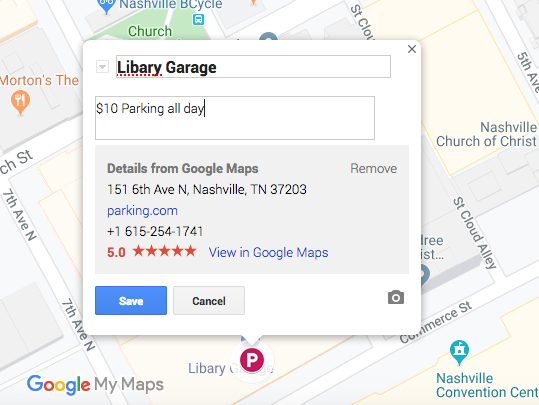
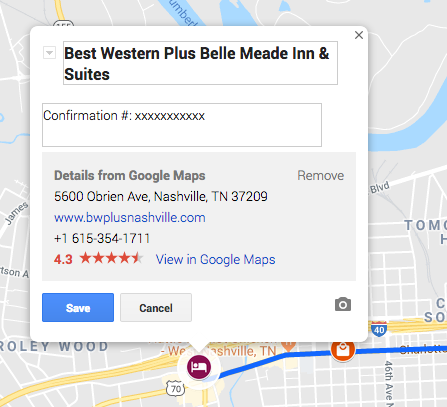
When using digital maps for travel planning, you are also able to add notes to your points along the way. I use this feature to add notes about parking cost if I’ve found any tips about cheap or convenient parking lots. I also like to use this feature for adding confirmation numbers for reservations we have.
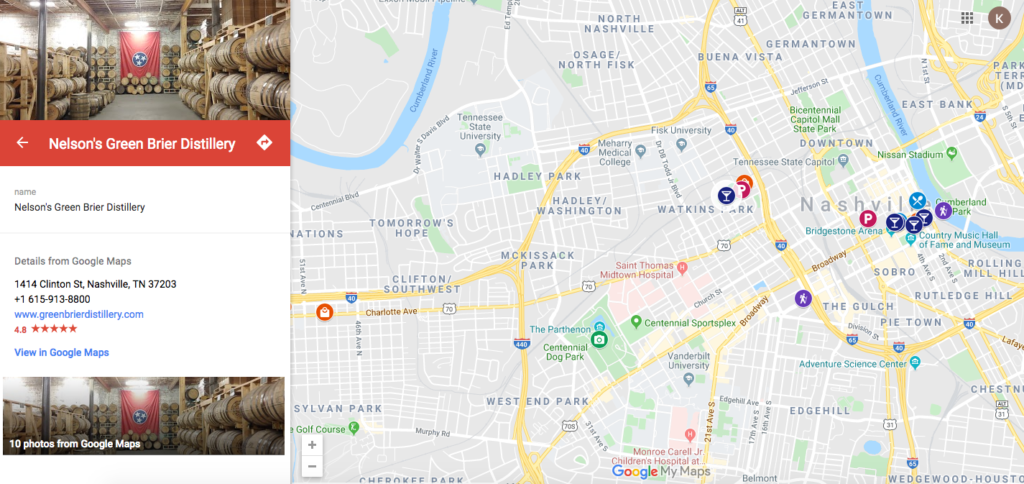
Once all your points are plotted, you can click the name of any save place on the sidebar to jump to that spot on the map. Google also pulls up information about the spot, including the website and phone number.
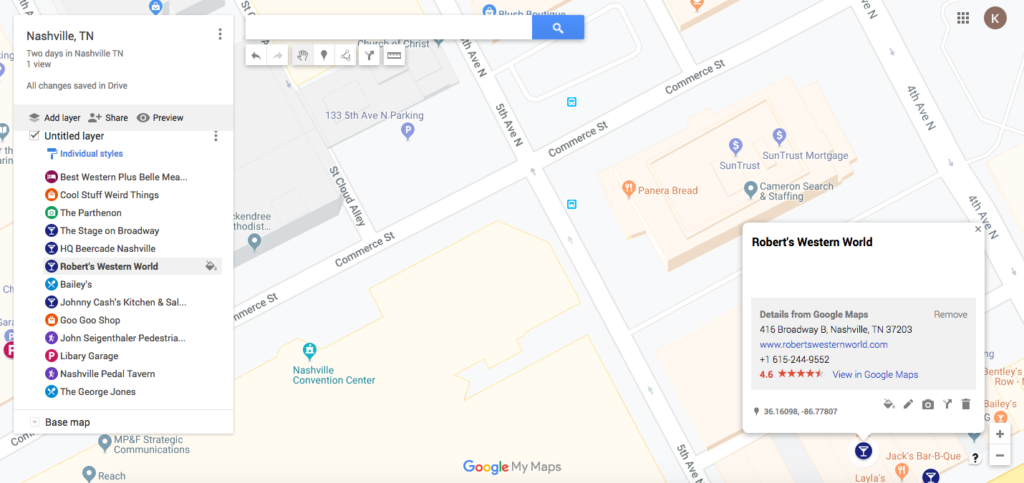
I like to organize my points by type. You might prefer to organize yours by day or location, and that’s fine too. I prefer to use the layer feature to plot out our route.
Using Layers
To utilize layers on your map, click on the directions icon at the top. It will automatically create a new layer that will allow you to plot out each point you’ve saved onto a route. I like to map out where we will be going for an entire day so I can see where we will be and when.
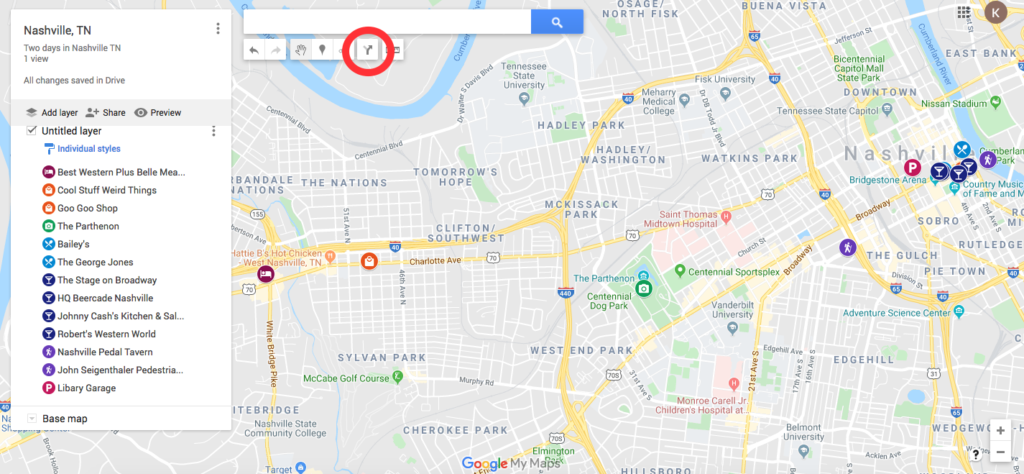
You can edit the name of the layers to keep your itinerary for your trip. To do this, simply click on the default name just like when you named your map.

Finalizing the Map
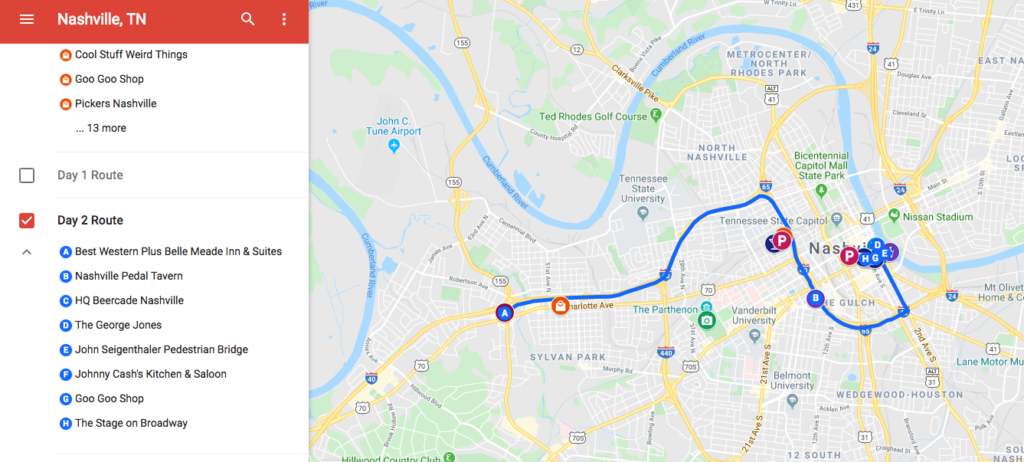
When you’re done plotting points, you can see the finalized map by clicking the preview button in the sidebar. Here, you’re able to turn layers on and off so you can see all your points or check your routes by day. If you choose to share your map with someone else, this is the view they would have.
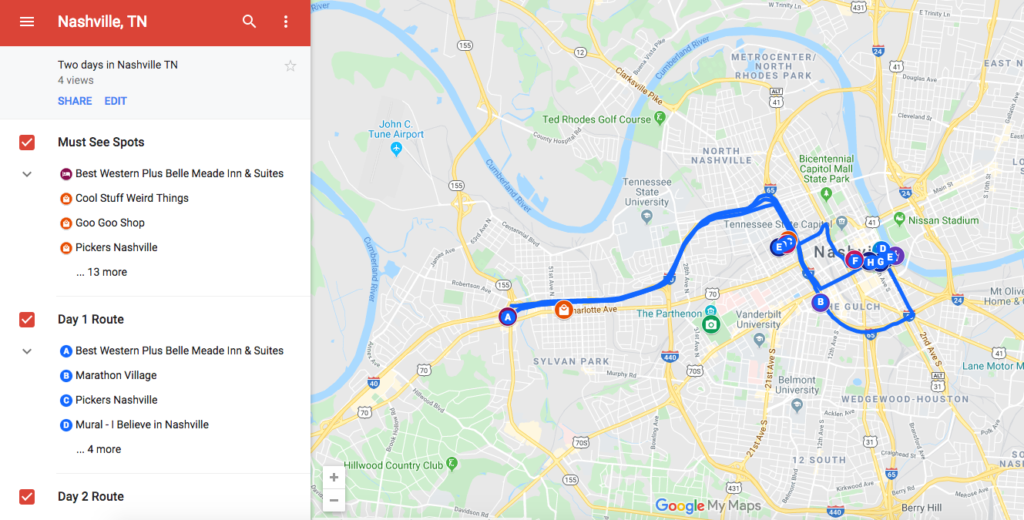
In preview mode, you can also click on any plotted point on the map for a more detailed view of each spot, including photos.
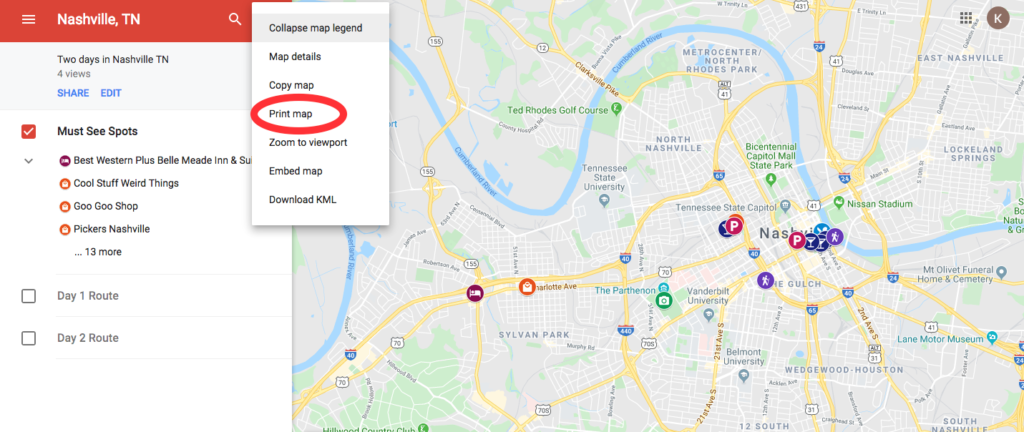
I love to print out a copy of my map before we embark so that I always have a hard copy of the information we gathered in case we don’t have service or my phone dies. To do this, click “print map” from the menu in the sidebar.
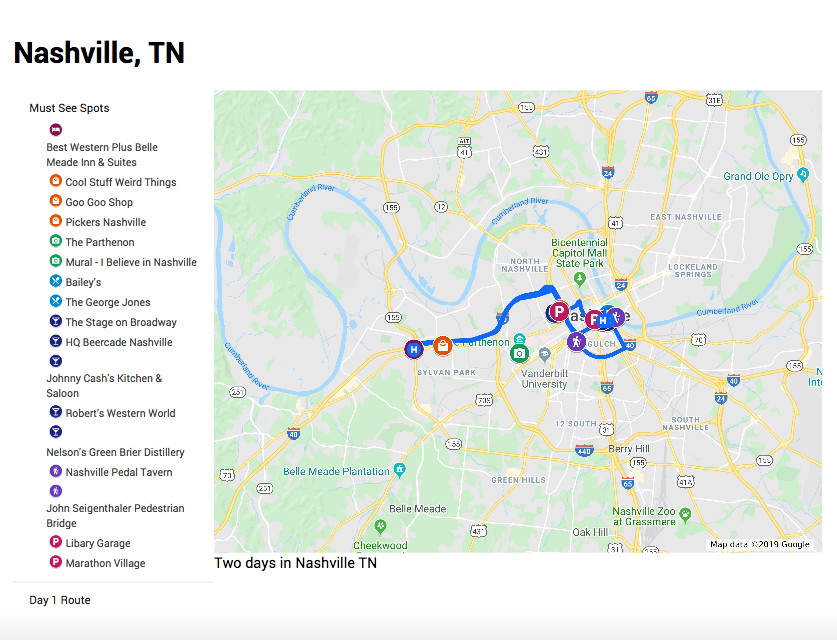
Your final printed map will look something like the image below. I don’t find this map to be super helpful for navigational use. It is, however, useful for getting oriented in a new city and having a quick reference list of places you want to see.
Did you find this guide useful for your next trip? I’d love if you dropped a link to your map below so I can see where you’re exploring next!